Posts tonen met het label liquid watercolour. Alle posts tonen

zaterdag 15 april 2023

Cherry blossom tree

You need:

  1. drawing sheet
  2. tempera paint in red and white 
  3. crayons
  4. liquid water color paint
  5. brush
  6. broccoli 

Step 1
Draw a tree with crayon.  


Step 2
Paint the background with diluted liquid water color paint and let dry.  


Stap 3
Stamp blossom with pieces of broccoli.  
 

Source: www.gluedtomycraftsblog.com 

dinsdag 23 augustus 2022

Sunflowers in pieces

by Neil

This lesson shows we can do more with our artworks dan stick them on a colored background. Pretty scare to tear or cut your drawing, but the effect is great! 

You need: 

  1. white drawing sheet 
  2. black construction paper for background 
  3. pencil
  4. oilpastels
  5. liquid water color paint
  6. brush
  7. scissors
  8. glue

Draw at least four sunflowers. Be sure three of them are over  the edges.  Color them with oilpastels. Paint the backgrond with liquid water color paint. 

Neil's drawing is torn in pieces. Those pieces have been re-glued for a spatial effect. Before tearing check which side of the paper is best. One side gives nice white tear lines, the other side does not.  

by Lyan

Lyan and Jurre have pasted black strips over their artword, creating a window through which you look outside. 

by Jurre

Elements of art: color, space.

vrijdag 6 augustus 2021

Sail with the VOC

 
by students of grade 6

 You need:

  1. drawing sheet A3 size
  2. drawing sheet A4 size
  3. liquid water color
  4. brush
  5. oil pastel crayons
  6. scissors and glue
  7. ice cream sticks
  8. boxcutter
  9. cutting plate
  10. newspapers 
  11. paper towels
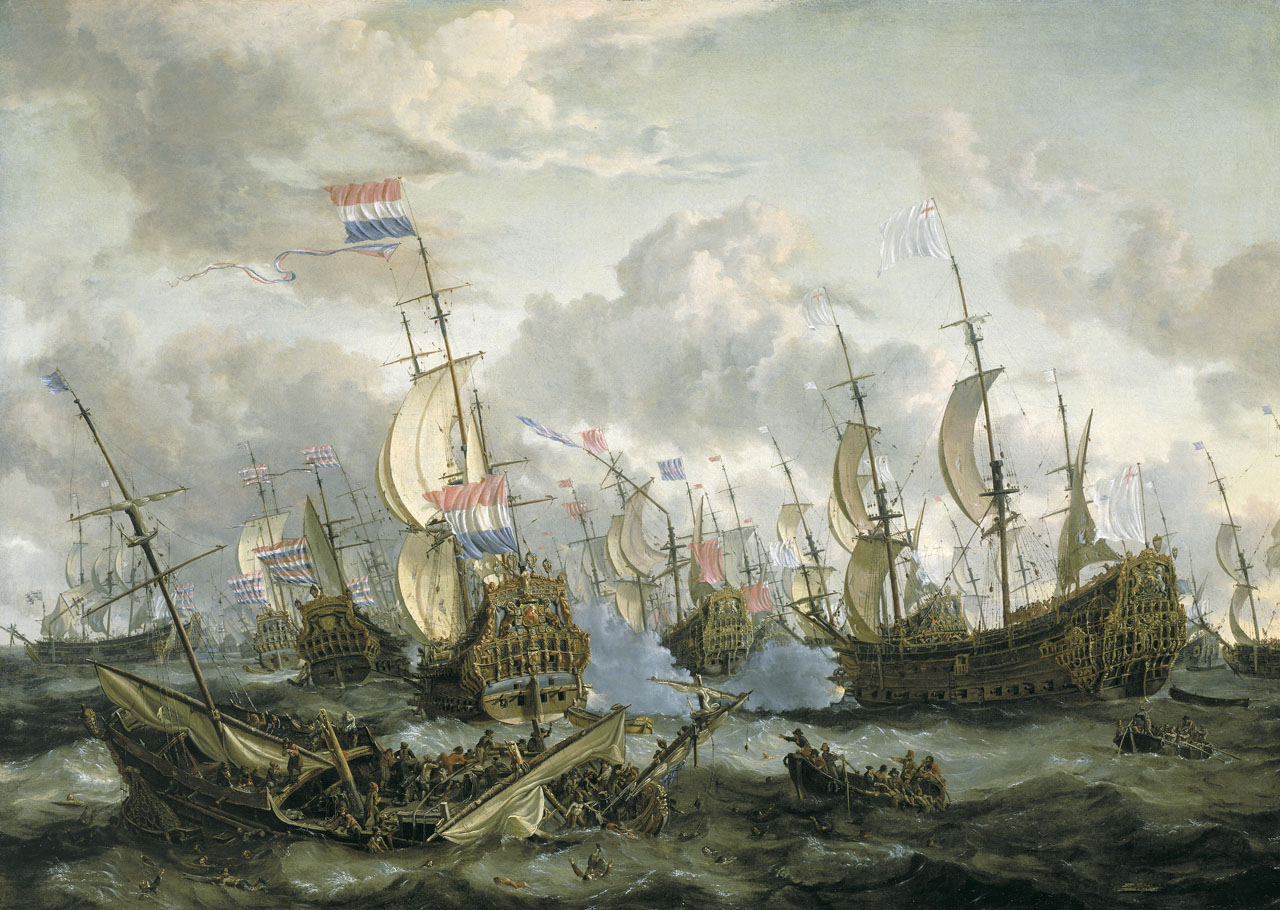
Towards the end of the Golden Age, the Netherlands are at war with England, a battle that is being fought at sea. 
In this lesson students draw a sea ship from that time. 

Study paintings of ships in a battle. What stands out? How do you recognize the Dutch and English ships? Which flags do you see more? What do you see in the foreground of the first painting? What can you tell about the sails? How can you see those ships are in combat? 

Naval battle Anglo-Dutch war(1666). Painter: Abraham Storck

Burning of a part of the English fleet (1667). 
Painter: Pieter van de Velde 

What should you do?
Step 1
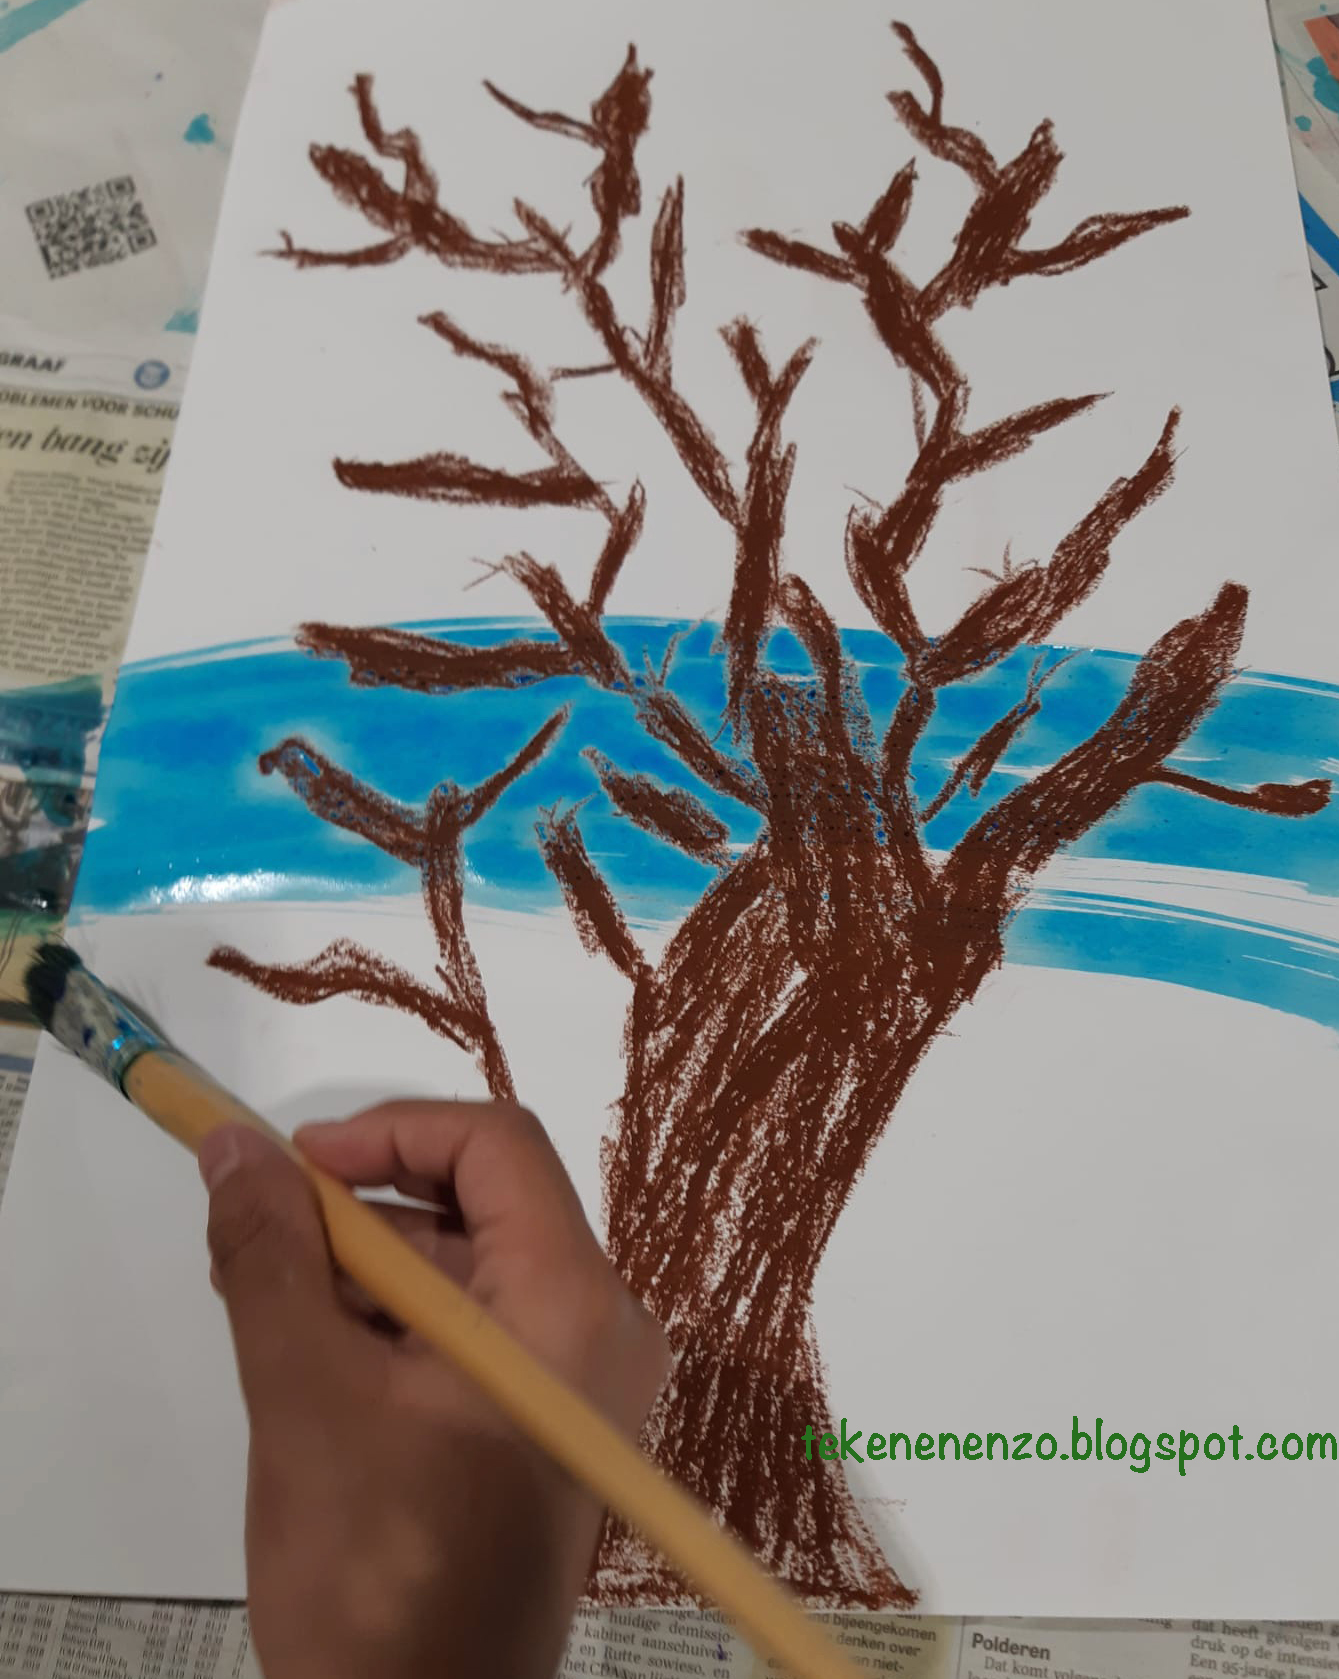
First you paint the background on the largest sheet with liquid water color paint. At the bottom (near by) the water is dark, further away it becomes lighter (add water). 

Step 2
Draw on the A4 sheet a VOC-ship with oil pastel and color it. Draw and color extra things which you also see in the water during a naval battle, such as fire,, aa life boat, an anchor etc. Do not forget tho color the sails white!


Step 3
Paint your drawing with blue water color paint. Wipe the excess paint off the white sails with a paper towel. Let dry. 

Step 4
Cut out all parts, leaving a blue edge. Stick ice cream sticks behind the loose parts. Take the large blue painted sheet and decide where you want hour ship and the other things. Cut slices of about 3 cm in this sheet. Insert the sticks into the background and the artwork is done. 

Source: Laatmaarleren.nl 

zondag 8 november 2020

Same insect - different colors


made by student of grade 1

You need:
  1. drawing sheets A5 size
  2. crayons
  3. liquid watercolor paint 
  4. brush
Draw two the same insects and color them with crayons: one with cool colors, the other with warm colors. 
Paint the background with dilluted watercolor paint: warm colors for the 'warm' insect, cool colors for the 'cool' insect. 


Element of art: color.

zaterdag 12 januari 2019

Cat on head - like Corneille


Made by a student of grade 3
You need:
  1. drawing sheet A3 size
  2. oil pastels
  3. liquid watercolor paint
  4. brushes
Corneille painted often cats, birds and women. There are some paintings where he painted the cat on the head of a woman!
Show Corneille paintings on the digital board or use google: 'Corneille woman cat'.

Who of you has a cat at home? Does it ever lie with you? Does your cat ever lie on your head?
Look at these artworks. What do you see? Why would the painter left the cat's eyes white?  Do the women on the paintings have hair? 

Draw a head on your sheet with oilpastel (dark color). Maybe your own head, but you may choose another head too. Draw a cat sitting, standing or lying down on the head. The cat looks like hair! What hairstyle it is, had to do with the position of the cat. 
Color your drawing with bright colors. Trace the outlines with a dark color if necessary and paint the background with liquid watercolor paint. 

Made by a student of grade 3

There are more lessons about Corneille on this blog! Use the search function. 

zondag 11 november 2018

Catching leaves

Made by students of grade 4
You need:
  1. white drawing sheet A3 size
  2. oil pastels
  3. liquid water color paint
  4. brushes
Students trace their hands (thumbs point to each other) on the bottom of the sheet and color them with oil pastels. They draw swirling autumn leaves above the hands and color them with oil pastels too. Paint the background with diluted liquid water color paint and leave some space on the edges.


donderdag 13 september 2018

Patterned trees collage

You need:
  1. white drawing sheet A3 size
  2. liquid water color paint
  3. brush
  4. construction paper in several colors
  5. scissors and glue
  6. black fine marker
Fold the sheet in two. Paint the upper half blue, the  lower half green. Leave the edges white. 
Cut several shapes from construction paper: ovals, 'clouds', circles.   
Use a fineliner to draw the trunk and fill the shapes with a variety of patterns.  
Paste the shapes on the painted sheet and be sure the shapes overlap each other to suggest depth.

woensdag 12 september 2018

Portfolio: Bad Hair Day

You need:
  1. white sheets
  2. liquid watercolor paint
  3. straws
  4. oil pastel crayons
How to draw a face? We used the website Wikihow. Students draw their own face on a large white sheet and color it with oil pastels. Drop liquid water color in several colors above the head and blow it in different directions using straws. 


On the photo our proud third grade students with their portfolio's in which we collected all the artwork of this school year.

maandag 11 april 2016

Funny houses like James Rizzi


Made by Kalen, grade 4

You need:
  1. white drawing sheet
  2. crayons 
  3. liquid watercolor paint
  4. brushes
  5. jars with water 
James Rizzi was born in 1950 in Brooklyn. He studied art in Florida, where he started experimenting with printing, painting and sculpting. Rizzi’s work often shows his birthplace New York. His paintings look sometimes childishly naive, with the bright colors and brilliant gaiety. In the art press Rizzi is often described as "Urban Primitive Artist '. Rizzi himself says he is influenced by Picasso, Klee and Dubuffet.

Made bij Jade, grade 4

Show some paintings of Rizzi and discuss the characteristics:
  • bright colours
  • no gradations within colours
  • evertything is outlined with black
  • houses have human faces/characteristics
  • the artwork is full and busy
  • background is full too
Students use a dark color crayon to draw a house in Rizzi style, a house with human characteristics like hair, mouth, eyes etc. 
Paint with liquid water color paint.

zaterdag 13 december 2014

Christmas trees in the snow


By students of grade 2

You need:
  1. large drawing sheets 
  2. liquid watercolour green and red 
  3. oilpastel crayons 
  4. brushes
Draw a wavy line, the ground. Draw several christmas trees. Simple triangles are okay, this lesson is about overlap - not all the trees next to each other. Decorate the trees with balls and garlands and draw presents under the trees. Colour with oil pastels. Use white oilpastel for snowflakes.
Paint with liquid watercolor, the ground has to stay white.

dinsdag 28 oktober 2014

Halloween cat and window


Made by a student of grade 4
You need:
  1. white drawing sheet
  2. liquid water colour paint 
  3. brush
  4. black construction paper 
  5. cutting knife and mat
  6. glue
  7. black marker 
  8. white chalk pastel
  9. carbon paper
  10. pattern
Paint a white sheet with yellow and orange liquid water colour paint. Enlarge the pattern and trace it on the black sheet using carbon paper. Put a cross in the parts that have to been cut. Cut the pattern and paste it on the coloured sheet.
Draw Halloween details with black marker. Use the white chalk pastel for details on the black paper. 


Source: halloweenwitchesflyinmachine.blogspot.nl/

vrijdag 14 maart 2014

Stacked birds

 
Made by students of grade 3/4

You need:
  1. drawing sheet 20 by 40 cm
  2. crayons
  3. liquid watercolour paint
  4. brushes
Inspirated by a picture on Pinterest.
Draw at least three birds sitting on eachothers back. The birds have to get smaller while getting higher. Colour with crayons.
Paint the background with liquid watercolour paint leaving an edge from about 1 cm. 

donderdag 6 februari 2014

The best nest


  1. drawing sheet
  2. oilpastel
  3. liquid watercolour paint
  4. brushes
  5. 3D tape
The best nest for birds in winter is a colourful one! This birdhouse will protect birdies against snow and cold.

Students draw a birdhouse and colour it in with oil pastels. Perhaps there's also a  peanut pendulum on the house. Draw  snowflakes (white oil pastel) and also a layer of snow on the house.
Paint the background with liquid watercolor. Leave about 1 cm white on the edges for an extra winter look. Draw (or print) a bird on another piece of paper and cut it. Paste it in the house using 3D tape for a spatial effect (the pads that are used to create 3D cards).

Made by students of grade 1/2

maandag 7 oktober 2013

Singing in the rain

Artwork made by a student of grade 1
You need:
  1. white drawing sheetA2 size
  2. crayons
  3. liquid watercolour
  4. brush
Students draw a person under an umbrella and colour it in with crayons. Then they draw raindrops with white crayon. Paint the entire drawing with liquid watercolour.

Be sure that:
  • rain falls from top to bottom;)
  • under the umbrella is no rain
  • rain is transparent, so we draw with white on white!
  • rain forms puddles on the ground

dinsdag 1 oktober 2013

One colour city - group work like Alisa Burke

You need:
  1. drawing sheet A1 size
  2. drawing sheets 10 by 20 cm (A4 size cut in three) 
  3. various colouring materials: crayons, oilpastel, colour pencils, watercolour paint, markers, tempera etc. 
  4. fine black marker 
  5. liquid water colour paint 
  6. big brush
  7. scissors
  8. glue
An artwork I came across on Pinterest from Alisa Burke was the inspirations for this lesson. Show Burke's work and discuss it: all houses in the same colour, windows are white, everything is outlined with black marker, houses uizen hebben één kleur, de ramen zijn wit, alles is zwart omrand, the houses aren't just next to each other but behind each other and (overlap). That means you cannot see the bottom of the houses that are not on the first row. 

Students form groups of four and discuss together the colour they'll choose. One of the students paints the background: use white crayon to draw stars or clouds and then paint the entire sheet with with liquid watercolor. Leave about one inch white along the edges.

On the smaller sheets students draw high houses, with windows and doors and decorations. Colour with the material of you choice. Outline the house and windows with black fineliner and cut it out. Be sure the group draw together about 15 houses.
Lay the painted houses on the large sheet to get a beautiful collage. Note that you do not see undersides of the houses that are not in the front row.

Made by students of grade 5/6

donderdag 13 december 2012

Happy new year


Made by students of grade 3 and 4 

You need: 
  1. white drawing sheet A4 size
  2. blue liquid water colour paint 
  3. brush
  4. crayons
  5. black and yellow or orange construction paper
  6. yellow chalk pastel
Show pictures or movies about fireworks and discuss what this looks like. Use crayons to draw fireworks on a white sheet. Paint this with blue liquid water colour paint. Let dry.
Cut a skyline out of half a sheet of black paper. Paste this on the blue sheet. Cut windows from yellow or orange paper.
Draw a yellow chalk line on the roofs and smudge it.   

zondag 18 november 2012

Spider in coloured web

Made by students of grade 2
You need:
  1. white drawing sheet A4 size
  2. blackoilpastel
  3. autumn leaves
  4. liquid water colour in orange and green
Divide the sheet with a black oil pastel in eight parts: two diagonal lines, one vertical and one horizontal. Draw a web between those lines. Draw one or more spiders in the web.

Colour the different parts with liquid water colour in orange and green.

vrijdag 12 oktober 2012

Owls in the moonlight

Background of dilluted water colour paint 

You need:
  1. drawing sheet 60 by 25 cm
  2. white drawing sheets
  3. brown wrapping paper
  4. indian ink 
  5. liquid water colour paint
  6. brushes
  7. pieces of styrofoam
  8. pencil
  9. flat piece of glass
  10. paint roller
  11. block printing ink
  12. chalk pastel
  13. saucer
Background of dilluted water colour paint  mixed with a drop indian ink  

Part one:
Put a saucer on the big sheet. This piece of paper remains white; the moon. Paint with highly diluted indian ink or liquid watercolor (also dilute it with water) and a large brush in one direction. Make sure the dish does not move. Paint with big strokes and leave the edges a little white. Let this dry.

Part two:
Divide the class into two groups. Group 1 paints the branch, group 2 is going to print owls.

Branch painting:
Paint with indian ink a branch with side branches on the painted sheet. Remember that a branch becoming thinner towards the end. Do not paint around the moon, but through it. If the branch stands out too little against the gray background, outline the branches later with white chalk for a better contrast.

Printing the owls:
Group 2 will start with the owls. Give each student two pieces of styrofoam. Students have to press two different owls in the foam. Put some blockprint paint on a glass plate. Roll the paint on the piece of foam. Then place a sheet (remember to write names on each sheet!) and rub with flat hand over it. Pull off the paper. Create several prints in different colors and on different kinds of paper. In this lesson we used white paper and brown wrapping paper.

A student who has finished printing, takes place on the painting table and paints his branch. Students who have completed the branch, follow up with printing.

Next day:
When the owls are dry (with block print this takes at least a day), they have to be cut leaving one millimeter space around. Use yellow chalk to draw a circle around the moon. Paste the owls on the branches.

Background of dilluted indian ink, branches outlined with white chalk pastel 

All artworks are made by students of grade 4

maandag 3 september 2012

Frogs in the pond


  1. white drawing sheet A4 size
  2. blue liquid water colour
  3. water
  4. brushes
  5. water colour paint
  6. tempera paint
  7. stencil brush
Make the sheet wet with a large brush. Drip a few drops of ink on the sheet and spread it by moving the sheet or by painting with the brush. Let dry.
Paint some frogs with watercolour paint. Use a pear as the basic form. Painter parts of frogs on the edges of the sheet. Stamp with a stencil brush and some green and yellow tempara aquatic plants in the water.
Staple the art work on a coloured background.

Artworks made by students of grade 4

woensdag 9 mei 2012

Half chicken


You need:
  1. drawing sheet A4 size
  2. oil pastels
  3. blue liquid water colour
  4. brush
  5. jar with water
In this lesson students draw one chicken together. Fold a sheet in half and draw a half chicken. Colour with oil pastels. Draw with white oil pastel one or more eggs. Give the sheet folded to a fellow student, and be sure he does not see what was drawn. Tell what there has to be drawn, the head or the body. Mark with two little lines the places where the fellow student has to connect and draw a mark for the hight of the horizon line.
If the second student is ready, they fold up the sheet open. Hilarious!

Paint the whole drawing with blue water colour paint and lots of water. The oil pastels will resist the water and thus the white eggs come forward again.
 
Artworks made by students of grade 3